Hey Y’all!
This was long overdue but I am so happy to share my update since my first post about the living room transformation. The goal of this post is to inspire others to go out there and get creative, tackle that project and give you creative ideas on how to save a buck or two along the way!
Before we check out the new updates, I strongly suggest that you look back and see what my living room looked like before anything was changed. That way, you’ll really get to understand how everything has changed so far. You can check it out here
I know… not pretty guys, not pretty at all. But as we move on, you’ll see there’s been quite a few changes and i’m quite pleased with how it has turned out 😀
Now i’ll warn in advance that this is still not the final vision I have for the room but we’re getting there!
Now Check. This. Out!
 The first update you’ll see since my last post is I added a photo collage above the sectional. (Oh hey Baby Jonathan<3) I would still like to add more photos & wall art to it but for now I think it looks pretty neat! I also need to grab some more cushions because that couch is looking pretty naked. Not sure if I’ll buy or make some but whatever is easy and cost effective is what I’ll go with! Scroll down to take a closer look at the collage….
.
.
.

First thing you may notice is my color palette for this room is black, white, grey, silver and gold and I think it works! Now as you know, I’m a stay at home mama on a budget so I didn’t spend a ton of money in this room. The outer silver frames on both ends of the collage were plain wooden frames from the dollar store (loooove the dollar store, but then kimwho doesn’t?) so they cost a buck each and then I also bought some silver paint from the dollar store and my little sis painted them for me while I was busy with the boys (Thanks Jahlea!) and that was that! The total cost for those frames were $3. Then, in the second column you’ll see these cool industrial looking gold frames and some geometric/art deco styled black and gold frames. These were each about $3 and I purchased them about a year ago from this place in Toronto, Ontario called Closeout King. It’s this huge liquidation empire where you can find awesome deals on literally everything from clothing to furniture, home decor, bedding, snacks and drinks, party decor and so much more. If you like a good bargain you’ll LOVE this place. You can check out their locations here. Now in the center on the bottom is a multi photo frame, it’s pretty basic but I find it works well, it’s both silver and gold and I purchased it from Dollarama for another $2. And then finally the top center photo is my absolute favorite! This was an amaaazing wedding gift from a friend of ours who drew our portrait , yes folks, that’s an actual drawing. Awesome right? Unfortunately the original frame that it was in broke so I put it in this frame that I purchased a few years ago from a thrift store for $2. The pictures were printed at the Walmart Photo Center and I must say their website was super easy to use. I just uploaded some photos to their site, changed all the colors to gray scale and then completed my order. I picked them up in store the next morning. I ordered about 40 pictures in various sizes and it only cost about $14. So easy Right? The only issue is we aren’t allowed to put holes in the walls of our rental apartment so I had to purchase command hooks to mount everything which is why you’ll notice some frames are a bit crooked and not placed as well as I’d like. With the picture hanging command hooks, there’s no grace for error. Once it’s up, it’s up! So unless I’m willing to go buy a whole new set of hooks, I will gladly leave them where they are! ( I also got the command hooks at a bargain as I found them in the liquidation basket at my local grocery store so they were an additional 30% off the last ticketed price. Sadly I don’t remember what I paid but all that matters is that it wasn’t regular price! Total score on this collage right here if you ask me 😉
.
.
.
.
Next we have the new TV stand!!!

Guys, I love this TV stand so much. This is the Tomnas TV storage unit and it cost us $299. I wasn’t planning on spending that much originally, at first I was just going to buy the Kallax Shelf unit with the 8 cubes seeing as how it’s only $99 (click to see what it looks like) I’ve seen many people out there do some awesome hacks with this shelf or just accessorize it quite nicely and i figured it would do the job just fine for our living room but then, Ikea got me, I passed by this shelf and I had to have it! (well played Ikea, well played) But anywhoo… this shelf does a great job at filling in the blank, beige wall and also balances out the dark furniture on the other side of the room. There’s plenty of storage as well. And of course, every decor item you see was a total bargain!

I ended up going to the dollar store and purchasing the same baskets that I bought for my bookshelf from another post (Wanna See?) At $3 each it does the job, fits the color palette and looks great! I had to turn the basket on the far right sideways to fit as the last cubby hole is smaller than the rest, but overall i’m very satisfied. In the baskets we have DVDs, childrens books, videogames and accessories. The baskets at Ikea, although still fair priced, were between $15-20 each for the ones that I liked. Maybe in the future I’ll buy different baskets to give it a new look but the fact that I got 4 baskets for the price of 1 makes my heart happy 😀
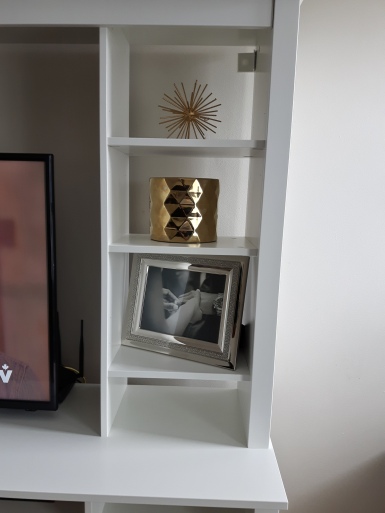
I’m still playing around with the side shelves and have to find something to put in the bottom shelf and fill out the top shelf but the GREAT thing is I only spent $2.50 on that prickly thing (“did she just call it a prickly thing???” yes, yes I did lol). I’m not sure if I bought it because it was only $2.50 or if it’s because I actually like it but I will find a way to display it correctly. I bought it at Sears again on sale (50% of the sale price). I’m thinking I should place it on top of a stack of books, what do y’all think? suggestions? The gold vase was free and I stole it from my bookshelf in my bedroom because I think it makes more sense here. That gorgeous frame from Papyrus is my favorite frame and was a wedding gift from one of my girlfriends and my cousin (Thanks Trisha and Cleo! xoxo They gave us the frame with matching champagne glasses, so cute!) I should have zoomed in so you could see the details but it has this glitter/rhinestone detail that gives it that awesome touch of glamour.

Above the TV stand you’ll find more savings. From L-R: gold picture frame on liquidation at Homesense for $3, Silver frame on liquidation at Sears for $2.50, Gold tray inherited from my grandmother, faux greenery arrangement cost about $4 ($1.75 for greenery from Homesense, vase $2 from Dollarama and rocks were free! I’m totally for fake plants that don’t look too fake lol) Next we have the silver frame on the right. It’s made out of real silver and also was from my granny so it has sentimental value. Finally this gold lamp cost about $40 for the base and shade. It was a mix and match set from Walmart. I had 2 of these lamps but my 4 year old decided that it was okay to play baseball indoors and the rest is history, but hey, the one lamp is perfect there! Despite there being two other lamps in the room, it can still be a bit dark at night so the third lamp was needed.
You guys already saw the curtains I purchased in the previous post but I have to show you the brass rod that I got! It was also a steal at $20

And I also didn’t give you a close up of the lamps that I bought from Ikea which are a good price at $39.99 but I bought them on sale 30% off at approx. $28. I have an idea to jack it up (Say yes to the Dress has me using this term all the time now lol) but i’ll reveal that later on. The lamps sits on some Ikea Lack tables that I got for free off of Kijiji a year ago but they are pretty beat up. I took them because I see an Ikea hack in their future. I’ll let you know what I come up with!

Now I would be lying if I showed you the good without showing you the not so good….My next post will reveal my DIY fail and the impulse buy that I really don’t like but have to live with for now. You won’t want to miss that! Otherwise, I hope you guys enjoy the changes as much as I have and will continue to be inspired to take on those projects you’ve been putting on the back burner.
Please feel free to leave a comment below and let me know what you think! Good or bad I’d love to hear it 🙂
Until Next Time,
Hugs and Love ❤
Lilly At Home

Cute! Love the photos above the couch.
LikeLiked by 1 person
Thank you! It’s coming along!
LikeLike
Okay that tv stand is perfection for hiding all the kid/baby stuff! I love everything you’ve done! And especially on a budget! Awesome job 🌿💚
LikeLiked by 1 person
Thank you so much!!! I needed something that would still allow my living room to look “adulty” when guests come over 😂
LikeLike
Haha, that’s a true struggle of being a parent !
LikeLiked by 1 person